搭建这个博客

搭建这个博客
前言
重启博客计划拖延了很久,一直在纠结使用 Hexo 还是 Hugo。
Hugo 比较快,但 Hexo 有 NexT 主题。
慢就慢吧,但愿我的文章可以多到 Hexo 解析不动的那一天。
安装
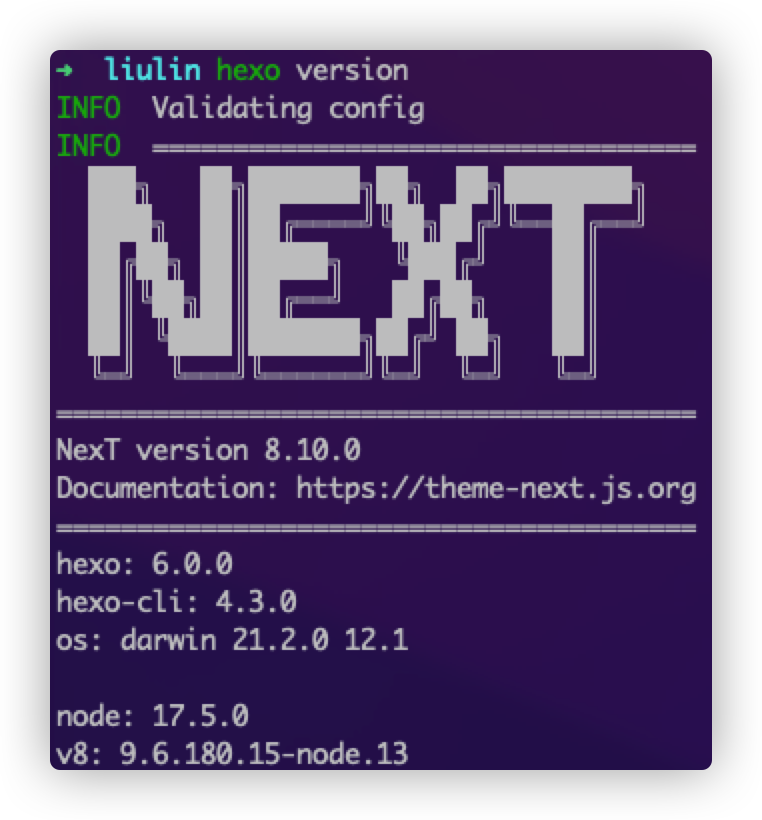
先贴下我的版本信息
安装 Hexo
依赖 Node.js 和 Git
- 安装 Node.js
- 安装 Git
安装 Hexo
$ npm install hexo-cli -gMacOS 也可以使用 Homebrew 安装
$ brew install hexo初始化博客
$ hexo init <your-hexo-site>安装 NexT 主题
进入博客目录
$ cd <your-hexo-site>
$ ls
_config.yml  node_modules  package.json  public  scaffolds  source  themes
拉取 NexT 主题
$ git clone https://github.com/next-theme/hexo-theme-next themes/next这个 NexT 主题在 GitHub 上已经有三个仓库了,要注意区分最新的仓库。
获取 tags 列表并切换到 release 分支
$ cd themes/next
$ git tag -l

# 切换到最新的稳定版本
$ git checkout v8.10.0
在站点配置文件 /_config.yml 中设置 NexT 主题:
theme: next把 NexT 主题配置文件移动到站点根目录,这样 Hexo 会优先读取根目录的主题配置,好处是方便后续编辑,并且更新主题时不会有冲突
$ cp <your-hexo-site>/theme/next/_config.yml <your-hexo-site>/_config.next.yml个性化配置
下面的操作默认都在博客根目录进行
添加标签页面
-
新建页面:
$ hexo new page tags -
设置页面(编辑
source/tags/index.md):--- type: "tags" comments: false --- -
修改菜单(编辑
_config.next.yml):menu: tags: /tags
添加分类页面
-
新建页面:
$ hexo new page categories -
设置页面(编辑
source/categories/index.md):--- type: "categories" comments: false --- -
修改菜单(编辑
_config.next.yml):menu: tags: /categories
添加 about 页面
-
新建页面:
$ hexo new page about -
修改菜单(编辑
_config.next.yml):menu: about: /about -
自行设计页面(编辑
source/about/index.md)
页面显式顺序与配置文件中各页面的顺序相同
首页文章显示摘要
在文章中适当位置插入 <!--more-->,该位置之前的部分即为摘要,会显示在首页中。
自动摘要
NexT 主题自带的自动摘要功能已经在 7.6.0 版本时被移除了:Remove cheers and auto_excerpt #1284
不过还可以使用 Hexo 的 excerpt 插件来实现这个功能。
在博客目录中运行:
$ npm install hexo-excerpt --save在博客配置文件 _config.yml 中添加:
excerpt:
  depth: 10
  excerpt_excludes: []
  more_excludes: []
  hideWholePostExcerpts: true
其中 depth 是摘要展示的层数。
试了一下体验不是很好,还是决定手动标签指定摘要。
卸载插件:
$ npm uninstall -S hexo-excerpt显示文章更新时间
编辑 _config.next.yml:
# Post meta display settings
post_meta:
  updated_at: true
文章更新时间默认使用文件的修改时间,如果想自己指定,可以在文章的 Front-matter (即文件最上方以 --- 分隔的区域)中加入:
updated: <update-time>其中,<update-time> 的格式示例为 2022-02-15 16:29:50。
设置代码高亮
Hexo 支持 Highlight 和 Prism 两种代码高亮引擎,可以在 Hexo 配置文件 _config.yml 中切换:
highlight:
  enable: true
  ……
prismjs:
  enable: false
  ……
NexT 主题同样支持 Highlight 和 Prism 两种引擎,并且提供了近百种代码高亮主题,主题可以在 NexT Highlight Theme Preview 中预览。
确定使用的主题后,编辑 _config.next.yml 文件,在对应引擎的对应模式下填入主题名字。
codeblock:
  # Code Highlight theme
  # All available themes: https://theme-next.js.org/highlight/
  theme:
    light: stackoverflow-light
    dark: stackoverflow-dark
  prism:
    light: prism-lucario
    dark: prism-lucario
  # Add copy button on codeblock
  copy_button:
    enable: false
    # Available values: default | flat | mac
    style:
使用 Prism 引擎时,配置预览页面中的 Prism additional themes 并不会生效,原因是 prism-themes 这个扩展包需要手动安装,博客目录运行命令
npm install prism-themes --save即可。
添加 Creative Commons 署名协议
编辑 _config.next.yml:
# Declare license on posts
# Creative Commons 4.0 International License.
# http://creativecommons.org/
# Available: by | by-nc | by-nc-nd | by-nc-sa | by-nd | by-sa | zero
creative_commons: by

post_copyright:
  enable: true
  license: CC BY 4.0
  license_url: http://creativecommons.org/licenses/by/4.0/
Hexo 插件
更换 Markdown 渲染器
由于 Hexo 默认使用的 Markdown renderer 是 marked,它不支持脚注/上标/下标/缩写,我们可以使用 Markdown-it 替代 marked:
$ npm un hexo-renderer-marked --save
$ npm i hexo-renderer-markdown-it --save
通过 Nginx 上线
添加 Nginx 官方仓库
vim /etc/yum.repos.d/nginx.repo
[nginx-stable]
name=nginx stable repo
baseurl=http://nginx.org/packages/centos/$releasever/$basearch/
gpgcheck=1
enabled=1
gpgkey=https://nginx.org/keys/nginx_signing.key
module_hotfixes=true
启用 Nginx 仓库
sudo yum-config-manager --enable nginx-mainline安装 Nginx
sudo dnf -y install nginx设置 Nginx 开机启动
sudo systemctl enable nginx创建 Nginx 配置目录
sudo mkdir -p /etc/nginx/sites-enable
sudo mkdir -p /etc/nginx/sites-available
修改 Nginx 配置
sudo vim /etc/nginx/nginx.conf

user  nginx;
worker_processes  auto;

error_log  /var/log/nginx/error.log notice;
pid        /var/run/nginx.pid;


events {
    worker_connections  1024;
}


http {
    include       /etc/nginx/mime.types;
    default_type  application/octet-stream;

    log_format  main  '$remote_addr - $remote_user [$time_local] "$request" '
                      '$status $body_bytes_sent "$http_referer" '
                      '"$http_user_agent" "$http_x_forwarded_for"';

    access_log  /var/log/nginx/access.log  main;

    sendfile        on;
    #tcp_nopush     on;

    keepalive_timeout  65;

    #gzip  on;

    include /etc/nginx/conf.d/*.conf;
    include /etc/nginx/sites-enable/*.conf; #增加这句,从配置目录中导入网站配置
}
增加 blog 配置
sudo vim /etc/nginx/blog.conf

server {
    listen 443 ssl;
    server_name www.liumumumumumu.com;
    root /home/liulin/website/hugo/public/;
    index index.html;
    ssl_certificate cloud.tencent.com_bundle.crt;
    ssl_certificate_key cloud.tencent.com.key;
    ssl_session_timeout 5m;
    ssl_protocols TLSv1.2 TLSv1.3;
    ssl_ciphers ECDHE-RSA-AES128-GCM-SHA256:HIGH:!aNULL:!MD5:!RC4:!DHE;
    ssl_prefer_server_ciphers on;
    location / {
        index index.html index.htm;
    }
}
server {
    listen 80;
    server_name www.liumumumumumu.com;
    rewrite ^(.*)$ https://www.liumumumumumu.com permanent;
}